Showing posts with label Amazon. Show all posts

Tuesday, 27 August 2013

Conversion - Amazons with bolas

Once again we have a conversion tutorial and this time John uses the power of superglue to arm his Amazons with bolas. Whilst I haven't yet tangled with them on the tabletop ...okay, okay I'll get my coat and leave you to the tutorial... :-)

We've started playing a war game that has a rule in it that allows for entangling opponents. The miniatures I chose to play are Amazon warriors and while I'm extremely pleased with the choice, there weren't any weapons included with the figures that would be able to entangle an opponent. My choices for the ancient history period we're in are fairly limited (basically a net or a bola). After very brief consideration I decided to see if I could fashion a bola or two for my miniatures.

Wargames Factory Amazon with bola conversion
I started off looking up how the bola is made normally. Apparently it's simply three leather or rope cords about 2 or 3 foot long that are tied in together in a knot at one end; weights (stones, metal bits, etc) are fastened to the other end. The thrower uses the knotted end as a handle and swings it round and releases toward the target (s)he wishes to ensnare.

Wargames Factory Amazon with bola conversion
To create my bolas, first I got a bit of thread and three tiny beads. I probably should have used smaller beads or made the weights from a bit of greenstuff as I think the end result may be a bit big as far as the weights are concerned, but what I had at hand was what I used.

I measured and cut three pieces of the thread into 2 inch sections and tied them together at one end. In hindsight, it probably would have been better to measure out 6-7 inches per piece and tie them together and then cut off the excess to the correct length, as that would have made tying them easier.

Once the three pieces were tied I slid one bead on far enough that the end would wrap around the bead and touch back to the main piece of thread. With a touch of super glue I affixed the bead in place and then wrapped the end over the bead and fastened it to the thread with another drop of super glue. I repeated the process for each of the other two threads.

At this point I was fairly happy with my bola. It was quite floppy but I thought it was a good representation of what I wanted. My next task was to superglue the bola to the figure. In the process I accidentally got superglue all over the thread and my fingers, which caused the happy consequence of making all of the threads stand stiff. I let them dry in that position while I cleaned the glue off my fingers and then finally glued the first bola to the figure.

I followed the same process for the second bola (avoiding gluing my fingers the second time). After a spray undercoat of khaki color, bleach boned on the thread and then a wash in sepia, the cords were completed. Ghost grey was used for the weighted ends.

Wargames Factory Amazon with bola conversion


Wargames Factory Amazon with bola conversion


Wargames Factory Amazon with bola conversion

Friday, 9 August 2013

Instant Mold - Satyr Conversion

We're back with another tutorial from the prolific John Dulle whose Amazon warband has received yet more reinforcements. This time it's a female satyr, or faun as the Romans called them, involving assorted plastic bits, milliput and Instant Mold.

Having seen Eddie play a faun in our wargame, I thought it might not be a bad idea if my warband had one as well. The only problem is I wanted all my characters to be female and to look extremely similar. To remedy this, Eddie traded me some GW beastmen bodies for some of my Amazons.

Finished  conversion using Instant Mold and plastic bits

Finished conversion using Instant Mold and plastic bits

To start, I was running out of Amazons and wasn't sure how well the conversion might work, so I used a handy product called Instant Mold, which is a reusable material that can be used to create molds very easily and quickly (highly recommended). After melting the Instant Mold with boiling water and then putting it in the rough shape I needed, I created molds of the top half of a couple of my Amazon warriors; the top half is all I needed for a faun and a centaur (a separate project).

Once cooled, I used GEDEO brand resin plaster (similar to plaster of Paris but much harder when fully cured – I got mine at Hobby Craft) to cast two new top halves of my Amazons. Once cured (says 30 minutes to de-mold on the box but I suggest 2 to 24 hours to prevent crumbling), I then cleaned up the mold lines and set them aside for a few seconds while I hacked off the top half of the Beastman.

I then checked to see how the top and bottom halves would match up. After deciding on a good facing, I super glued the two pieces together. Because the two pieces had slightly different musculature, I needed to use a bit of filler to make the pieces appear to be seamless. I chose to use Milliput to do this (the choice was based on the quantity of the stuff I have that is beginning to get old).

Finally came putting the arms and head on the Amazon and deciding which weapons to outfit her with. Because I had a bit of left over Milliput and I'd chosen to outfit her with javelins, I decided to create a quiver for extra javelins and super glued it to her back.

Primed, painted, varnished, based and ready for battle.

Amazon satyr

Amazon satyr

Amazon satyr

Amazon satyr


Thursday, 1 August 2013

Instant Mold - Centaur Conversion

Greetings fellow travellers! Today we have our first ever conversion post written by my pal, John Dulle. John has been creating an impressive Amazon warband for our skirmish campaign and has kindly written up a few quick tutorials on how he made some of the more unique models in his warband. Enjoy!

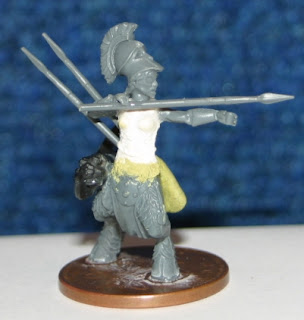
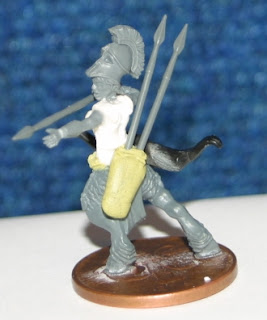
Instant Mold and plaster resin parts with plastic bits
Resin cast Centaur conversion - left view
I'd seen Centaurs used in battle against me and decided I needed to add some to my warband. With some finely donated horses to the cause, I decided to see what I could do to create my own centaur.

Instant Mold and plaster resin parts with plastic bits
Resin cast Centaur conversion - front view
The first thing I did was to use the Instant Mold to mold the two halves of the horse. I wanted to cast the pieces in resin plaster and join them instead of using the plastic horses given for the cause because I wasn't sure how successful it would turn out. Additionally I was casting the Amazon top halves at the same time, so it was easy to mix up the plaster I needed to do the job.
Instant Mold and plaster resin parts with plastic bits
Resin cast Centaur conversion - right hand view

De-molding the horses was done too quickly (only after 30 minutes) and the pieces broke and crumbled in a couple spots. I had to leave them for 24 hours to completely harden and then I glued the horse's legs back on.

After sanding the two pieces of the horse together, I super glued them and then super glued the Amazon top half to where the horse's neck came to. I used a bit of Milliput to cover the seams and the saddle, which I didn't want to show, and then super glued it to the base. I probably should have put the Milliput in the excess spaces of the base at the same time, but I ended up doing it after all the painting was done, which wasn't really a problem since the basing material covered it anyway. After attaching the head, arms and weapons, I primed the whole thing and did the undercoat in khaki spray paint.

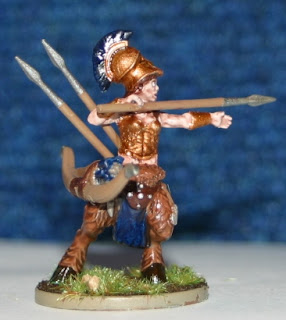
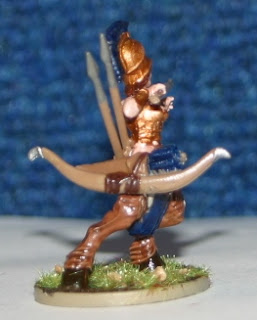
Painted, spray-lacquered and based. She had her first battle today.

Wargames Factory amazon Centaur conversion - left view
Wargames Factory Amazon Centaur conversion - left view

Wargames Factory amazon Centaur conversion - front view
Wargames Factory Amazon Centaur conversion - front view

Wargames Factory amazon Centaur conversion - right hand view
Wargames Factory Amazon Centaur conversion - right hand view

Wargames Factory Amazon Centaur conversion - head on view