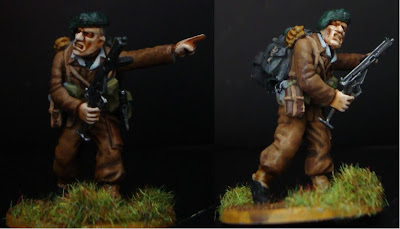
Today I'm pleased to introduce you to Troy Brand of Brand Painting Studios who will be showing us how to paint World War 2 British soldiers like a pro. If you're not a WW2 gamer you might find the colour scheme and techniques useful for painting imperial Guard or other SciFi troopers. That's all from me, over to Troy!
Ed
 |
| Warlord Games WW2 British Commandos |
A
couple of weeks ago I got my hands on some of
Warlord Games' WW2 British Commandos. My first impression of them
is that they are very well made. There are only a few mould lines to
file off and all the pieces fit together very nicely. Some pieces, like the
stocks on the sten guns, are very flimsy and prone to snapping before
even clipping them off the sprue. Another
good impression it made is that the sprue contains more than enough
arms, heads, berets, helmets and accessories to have a huge variety
of poses, weapons and faces. So,
having sat down and examined the pieces one by one and deciding on
the poses I wanted, I went ahead with my little project.
Getting the right colour scheme
It
is perfectly acceptable to paint Space Marines in red. However, anyone
would consider it a cardinal sin to paint Red Army soldiers in that
colour, and equally sinful to dress soldiers of the Wehrmacht in
pink, however funny the implication might be. So the first thing to
do before even priming your models is to look for reference material
to get the colour schemes as accurate as possible. This also means
researching the colours of the equipment as well as the uniforms
themselves. The internet is full of very good (and bad) sources for this but I found this rather handy picture on the Encyclopaedia Britannica's website which makes a nice reference.
 |
| British commando from 1944-45 |
Preparing the model
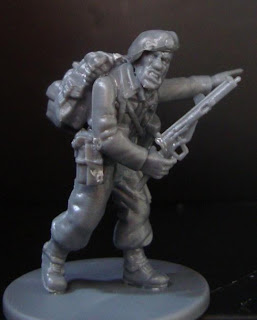
Once I had decided what colours I would use to represent our commando and his equipment, I decided I would try using a beret and equip the model with a sten gun, canteen and rucksack.After I had clipped the pieces I needed for the first model and filed them as necessary I put the model together and based it with some Citadel sand.
I proceeded to undercoat
the model with Grey spray primer from Humbrol. Lately I find grey to
be a perfectly good compromise between black and white. This has to
do with the type of paints I normally use, which are acrylics. They
usually need to be thinned down in order not to obscure detail. Two
or more thin coats of paint are usually enough to cover a surface.
Still, the paints retain a certain transparency. This allows for the
colour to appear muted if the undercoat is black, or equally very
bright if the undercoat is white. Grey
being more neutral allows for the true pigment of the paint to show
after the second thin coat.
Like I mentioned earlier, some techniques involve darkening and highlighting certain areas of the model by blending in different shades from a neutral base. However for this model I have applied a more traditional technique of layering highlights on to a darker shade then using a wash to produce a smoother transition from light to dark as, after a couple of lighter layers it would not have looked very natural. To achieve this I used Vallejo's Sepia Shade. Another good wash would have been Citadel's Agrax Earthshade but I prefer Vallejo's because of a higher pigment saturation. If you have the old Citadel Devlan Mud, I would recommend it for this also.
Painting World War 2 British Commandos: Part 2
Troy continues his tutorial with tips on how to paint skin tones.
If you enjoyed this tutorial, check out Troy's website. He does commission work and his rates are very reasonable. Ed
Painting the Commando's uniform
 |
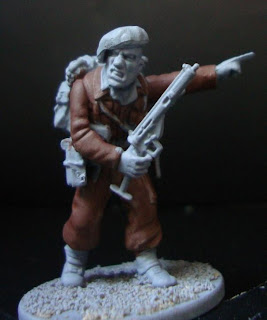
| Base coating the uniform |
Having
looked again at my reference, I picked Vallejo Flat Brown for the
uniform. When painting large numbers of models it is easier to paint
from one darker base coat and build highlights from it. There are
other techniques which require the use of a neutral colour onto which
shadows and highlights will be added, but for this model in
particular, this was not to be.
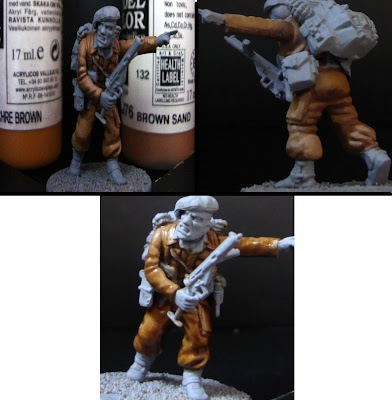
Once the base coat was painted I then went on to paint the first highlights. These were achieved by layering on a 1-1 mix of Vallejo's Ochre Brown and Brown Sand. To this mixture I added a drop (or less than) of Vallejo Off White for the second layered highlight.
 |
| Clockwise: First highlight, second highlight, wash for shading. |
Painting World War 2 British Commandos: Part 2
Troy continues his tutorial with tips on how to paint skin tones.


